ASTM D7112 for stability and compatibility of heavy fuel oils and crude oils
ASTM D7112 Standard Test Method for Determining Stability and Compatibility of Heavy Fuel Oils and Crude Oils by Heavy Fuel Oil Stability Analyzer (Optical Detection)
9. Hazards
9.1 Place the analyzer in a fume hood or similar well ventilated area to minimize exposure of operators to harmful vapors.
9.2 Operators should use proper protective laboratory clothing and gloves to avoid skin exposure to oil samples and solvents. In addition, operators should be careful when handling hot oil containers when preparing the stock solutions from very viscous oils as oil spills on exposed skin will cause burns.
10. Sampling and Test Specimens
10.1 Obtain samples in accordance with procedures described in Practices D4057 or D4177. Ensure that samples are representative of the whole batch of oil.
10.2 A minimum sample size of 40 g is required for a single test. It is preferable to collect a larger sample such as 200 to 500 g to allow for multiple testing, if necessary.
10.3 Ensure that the sample is homogeneous before withdrawing an aliquot or test specimen for testing.
10.4 To avoid changes or degradation of oil samples, minimize exposure to air, temperatures above 25°C, and light. Store samples in sealed, opaque containers such as metal cans or dark glass bottles.
11. Preparation of Apparatus
11.1 Review the operations manual for the apparatus, and follow all recommended steps. The following actions summarize the preparation of the apparatus:
11.1.1 Place the apparatus on a level surface, in a well-ventilated area such as a fume hood.
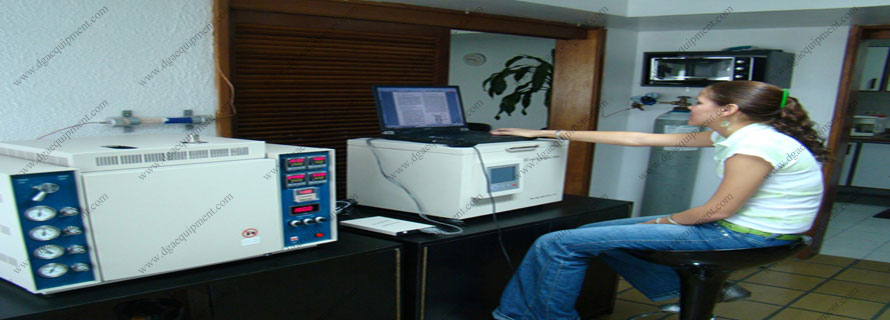
11.1.2 Connect the analyzer and the computer to a suitable ac power source, and connect the analyzer, keyboard, monitor, and mouse to the computer with the cables supplied.
NOTE 2 - All of the controls for the instrument except for the main power switch are accessed by means of the keyboard and mouse of the computer.
11.1.3 Fill the aromatic and paraffinic solvent bottles with xylene and n-heptane, respectively, and ensure the waste bottle is empty. Connect the three plastic bottles, labeled aromatic solvent, paraffinic solvent and waste, to the appropriate lines from the analyzer.
11.1.4 Switch the analyzer on using the rocker switch on the back panel. A green lamp will illuminate on the upper right of the front panel.
11.1.5 Switch on the computer and allow it to boot up.
11.1.6 Select either PORLA Step or PORLA Test by double clicking the mouse on the appropriate icon to bring up the PORLA Step measurement screen (see Fig. 4) or the system test screen.
12. Calibration and Standardization
12.1 Pump Calibration - Perform the pump calibration at the initial set-up and whenever the instrument has been serviced. When in continuous service, perform pump calibrations monthly to verify the pumping rates.
12.1.1 On the PORLA Step measurement screen (Fig. 4) select the Parameter screen (see Fig. 5). Calibrate the xylene and n-heptane pumps by starting the automatic procedure under Pump Calibration.
12.1.2 Identify two clean sample cups as "xylene" and "n-heptane", and accurately weigh to two decimal places. These are the tare weights of the cups.
12.1.3 The instrument automatically pumps solvent over a constant period of time (60 s) into a tared sample cup.
12.1.4 Weigh the collected solvent and sample cup and subtract the tare weight of the sample cup to give the weight of solvent pumped in the set time period (60 s).
12.1.5 Enter the weight of solvent collected in the appropriate screen.
12.1.5.1 For the xylene pump rate, the instrument calculates the updated pump rate in g/s and displays it in the appropriate field in the parameter screen.
12.1.5.2 For the n-heptane pump rate, the instrument calculates the updated pump rate and displays it in mL/s in the appropriate field in the parameter screen.
12.2 Evaporation Correction Coeffficient - Determine the evaporation correction coefficient for the xylene by weighing (accurate to two decimal places) a sample cup containing a stock solution after 0.5, 1.0, and 1.5 h of standing in the sample carousel and calculate the average solvent loss by evaporation in g/h. Input this information into the PORLA parameter screen, which is accessed by means of the Parameter button in the PORLA Step measurement screen.
12.2.1 Verify the evaporation correction coefficient quarterly when the instrument is in continuous service.
12.2.2 If a specific sample contains volatile components, such as a whole crude oil, use the semi-automatic Light Ends mode of operation. In this mode of operation, evaporation is minimized by loading the stock solution cups one at a time into the carousel. See 14.9.
NOTE 3 - No significant evaporation of solvent or sample occurs during the titration procedure because the sample cup is sealed in the test position in the instrument. However, evaporation of xylene does occur when several sample cups sit in the sample carousel during the fully automatic mode of operation.
13. Quality Control Monitoring
13.1 Confirm the performance of the instrument and test procedure by analyzing quality control (QC) samples.
13.1.1 The QC sample(s) should be a stable and homogeneous residual fuel oil or crude oil similar in composition and viscosity to the type of samples routinely tested, and containing from 1 to 10 mass % asphaltene. Asphaltene content may be measured by Test Method D6560.
13.2 Prior to monitoring the measurement process, determine the average value and control limits for the QC sample (see Practice D6299 and Section 3 of Manual 7).
13.3 Record QC results and analyze by control charts or other statistically equivalent techniques to ascertain the statistical control status of the total test process. Investigate any out-of-control data for root cause(s). The results of this investigation may, but not necessarily, result in instrument recalibration.
13.4 The frequency of QC testing is dependent on the criticality of the quality being measured, the demonstrated stability of the testing process and customer requirements. Generally, a QC sample should be analyzed each testing day for routine samples. The QC frequency should be increased if a large number of samples are routinely analyzed. However, when it is demonstrated that the testing is under statistical control, the QC testing frequency may be reduced. The QC sample testing precision should be periodically checked against the ASTM method precision to ensure data quality.
13.5 It is recommended that, if possible, the type of QC sample that is regularly tested be representative of the samples routinely analyzed. An ample supply of QC sample material should be available for the intended period of use, and shall be homogeneous and stable under the anticipated storage conditions.
13.6 See Practice D6299 and Manual 7 for further guidance on test method QC and control charting techniques.


